If you use USB drives or memory cards a lot, you might have been in one of those annoying situations where the storage device refused to open or it told you that it was “write-protected”.
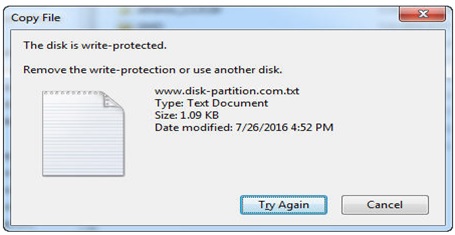
The ‘write protection’ feature is meant to protect the files it contains, but sometimes that protection can become a burden when you need to move files around.
Not being able to move your files over onto a USB flash drive or memory card is the last thing you want to deal with.
So, in this article, we shall walk you through how you can disable write protection on SD cards and USB flash drives using the ‘regedit’ program in any Windows computer.
There are other options through which you can disable ‘write protection’ on SD cards and other storage devices, but we opted for the aforementioned program because it’s one of the simplest to use and it is a default program in a Windows computer so you don’t have to install other programs which might slow down your machine.
But before we go into how you can use ‘regedit’, you need to know that some SD cards and USB flash drives come with switches to lock and unlock files.
So, if you try reading the storage device and it’s not displaying information, see if the device has a switch and use it.
If it doesn’t, then use the steps below to disable write protection on that USB drive or memory card.
Disable write protection on SD cards by editing the registry
On any version of Windows, you can run regedit.exe.
The storage device you want to unlock should be attached to the windows computer before you start.
To find ‘regedit’, click on the search icon on your keyboard and type regedit.
The option will appear in the search results automatically.
Alternatively, press Windows key + R combination on your keyboard.
In the pop-up Run dialog box, type regedit and PRESS Enter to open regedit.
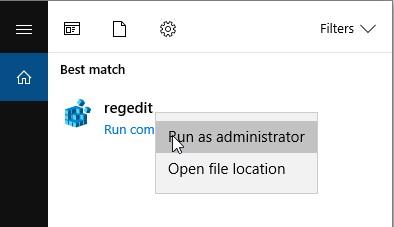
When regedit shows up, right click on it, to open it as an administrator.
The program is a bit like File Explorer, so you will need to expand the entries on the left-hand pane to navigate to the following keys:
Computer\HKEY_LOCAL_MACHINE\SYSTEM\CurrentControlSet\Control\StorageDevicePolicies
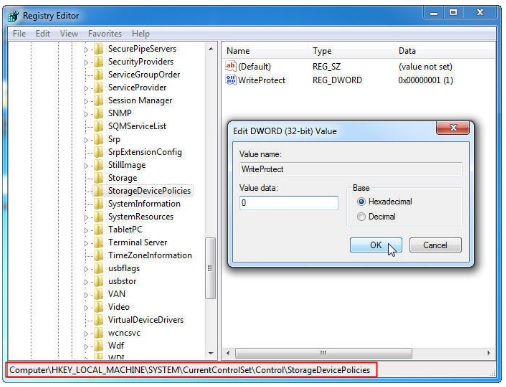
As shown above, double-click or right-click on the WriteProtect value in the right-hand pane and select ‘modify’.
In the pop-up window, change the Value data from 1 to 0. By changing the value for 1 to 0, you will have been able to disable write protection.
Click OK to save the changes, close regedit and restart your computer.
Note: If you are not able to find StorageDevicePolicies, here’s how you can create it and its easy.
In the Control Folder, right-click on the white space. Select “New -> Key” and name your new creation “StorageDevicePolicies”.
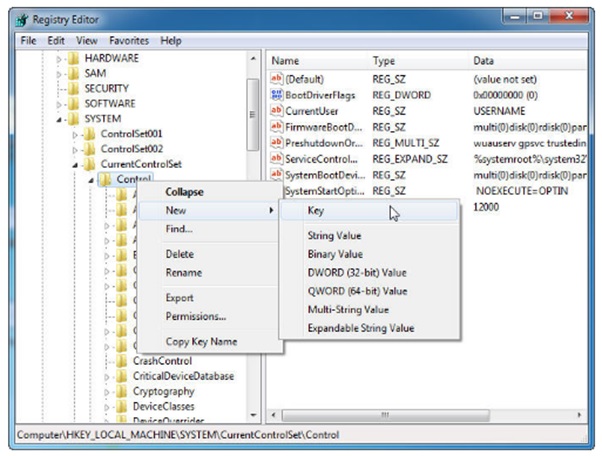
Double-click on the new key (it will show as a folder) and right-click once again in the white space and choose New -> DWORD.
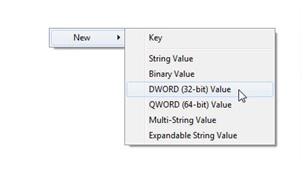
Name this WriteProtect and set its value to 0. Click OK, exit regedit and reboot your computer.
[ot-video][/ot-video]
In instances where the above procedures are not able to help remove write protection, it means that the device may be corrupt or physically broken and no software will make it work again.
The only solution, in this case, is to buy a new drive.
Read more:
UCC warns of new mobile money scam, inside job cited
How tech savvy crooks use your mobile phone line to rob you