
Windows 10 has an inbuilt feature that lets you turn your Windows device into a Wi-Fi hotspot without requiring any additional apps. Windows 10 allows you to broadcast your Wi-Fi, Ethernet or cellular data connection as a Wi-Fi hotspot in a few very easy steps. Here’s how;
To configure the Wi-Fi hotspot on your Windows 10 PC or Laptop, click on the Windows icon at the bottom that launches your start menu. This opens the Windows 10 menu where you can click to open “Settings”.
Illustration
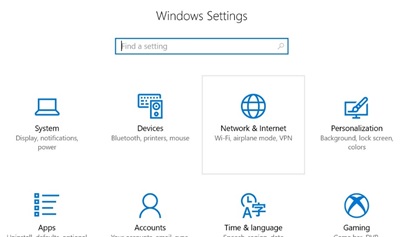
This opens the Settings menu with various settings options. Click on the “Network & Internet” option and afterward click to select and open the “Mobile Hotspot” option from the list displayed.
Illustration
Must read: Uganda’s Musana Carts signs expansion deal with Coca-Cola
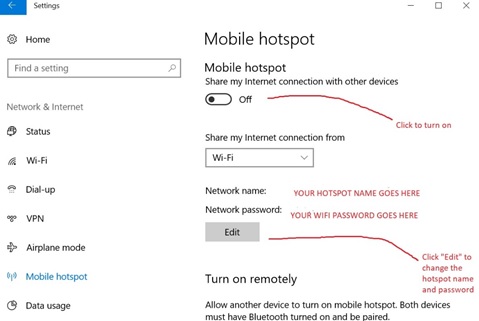
The “Mobile hotspot” option will open up a section where you can click to turn on the hotspot. By default, the current internet connection in use will be the one shared. If you have only one internet connection configured, this list will only show that one connection. If more connections exist, you can choose the internet connection you wish to share from the list provided.
After specifying the internet connection to share, your hotspot should be activated with a default “Network name” and “network password” which are displayed on your PC.
Illustration
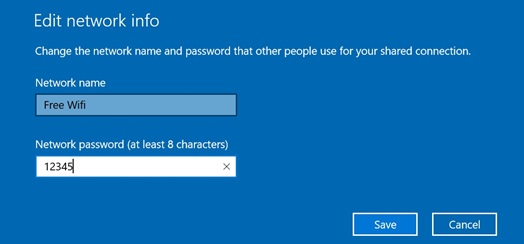
To edit this information, simply click on the “Edit” button below the Network password and a blue “Edit network info” menu will open where you are prompted to edit your network name and password. Click save after entering the new information. The Wi-Fi hotspot will be updated.
To connect to this Wi-Fi, simply use a Wi-Fi enabled device to search for the network. Click to add the network and enter the network password.
More on Windows 10:
How to determine your computer specifications in Windows 10
How to free up disk space in Windows 10