
iPhone has a variety of free ringtones to select from, but like any other discerning iPhone owner you may need a ringtone that suits you, and there’s no better choice than a song you love.
But Apple doesn’t allow or let us pick a song from our music library, and of course, nobody wants to pay for ringtones.
Worry not, you can make customized ringtones using your favorite songs on your iPhone.
All you need is to open up iTunes on your macOS or Windows computer and USB cable to connect your iPhone to your computer.
We use iTunes to make playlists of our favorite songs, so let’s use it to make our favorite ringtone. iTunes has all of the tools necessary to do this 100% free of charge.
In this article, we will show you how you can make ringtones for an iPhone (create a custom ringtone using iTunes) without making any purchase.
A few preliminary steps before you make your iPhone Ringtone
– Make sure that you’ve updated to the latest version of iTunes on your computer to avoid any tech snafus along the way.
– Next, you need to choose an already purchased song from your iTunes library and download it to your computer.
– Then you’ll want to select the part of the song you’d like to use. Ideally, you’ll want your ringtone to last 20–30 seconds.
Snippets shorter than 20 seconds can’t be used. For this tutorial, I selected the first 30 seconds of “Trouble Will Soon be Over” by Sinead O’Connor. Play around until you’ve found the exact snippet you plan on using for your ringtone. I’ll explain below how to save only that section.
– Make sure you have a Lightning cable handy.
Creating your free ringtone in iTunes with a PC or a Mac
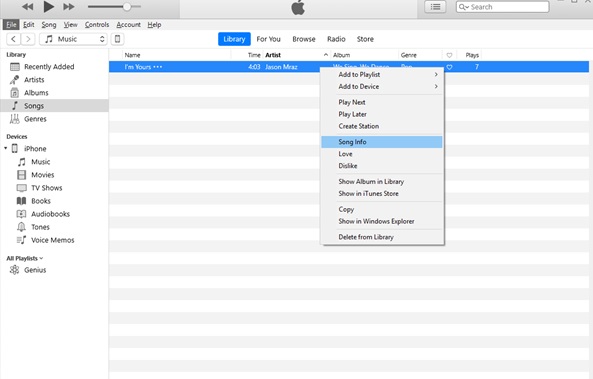
Open iTunes on your Mac or PC, then right-click the song you’d like to make a ringtone from and select ‘song info’
On the info screen, hit the “Options” tab. Then you will see “start” and “stop” boxes, this is where you will enter the start and stop times of the section of the song you’d like to use as your ringtone.
For instance, my song is starting at 0:05 and ending at 0:35. It’s better to use decimals in order to be precise.
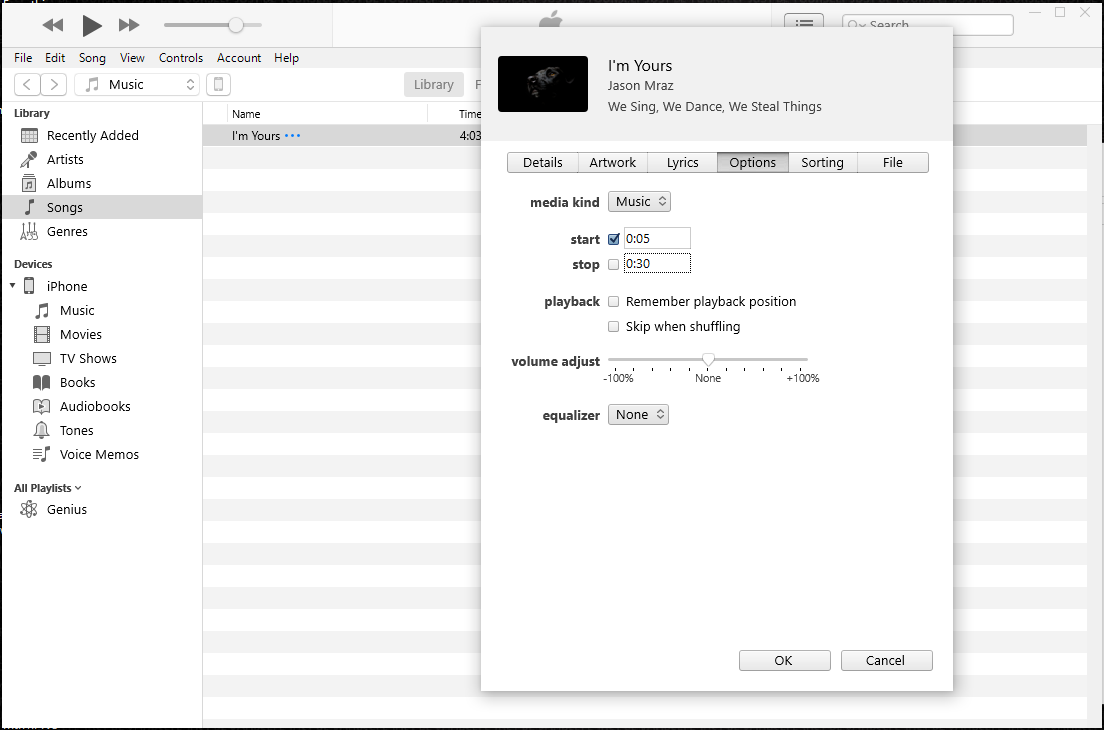
After you’ve chosen the 30 seconds that you plan on using for your ringtone, click OK.
Convert the Song to AAC format
When you are to make ringtones for an iPhone, you’ll need an AAC file. AAC is a file type that was meant to replace the MP3, with higher-quality compression at the same bit rate.
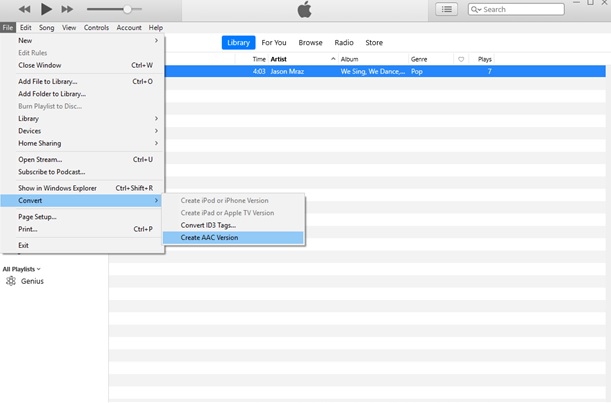
To convert the song, select “File” from the menu bar, and click “Convert,” and then select “Create AAC Version.” This will make a copy of the shortened song in AAC format your original song will be safe.
Below the original song, you can now see the new 30sec version of the ringtone version of the song.
Once you’ve created an AAC version, you should go back to the original copy of your song’s info window and reset the start and stop times. Otherwise, you’ll only hear the selected 30 seconds of your song any time you play it.
Change the File from M4A to M4R format
In order to make this short AAC file a ringtone, its format must be changed to another that Apple recognizes as ringtones.
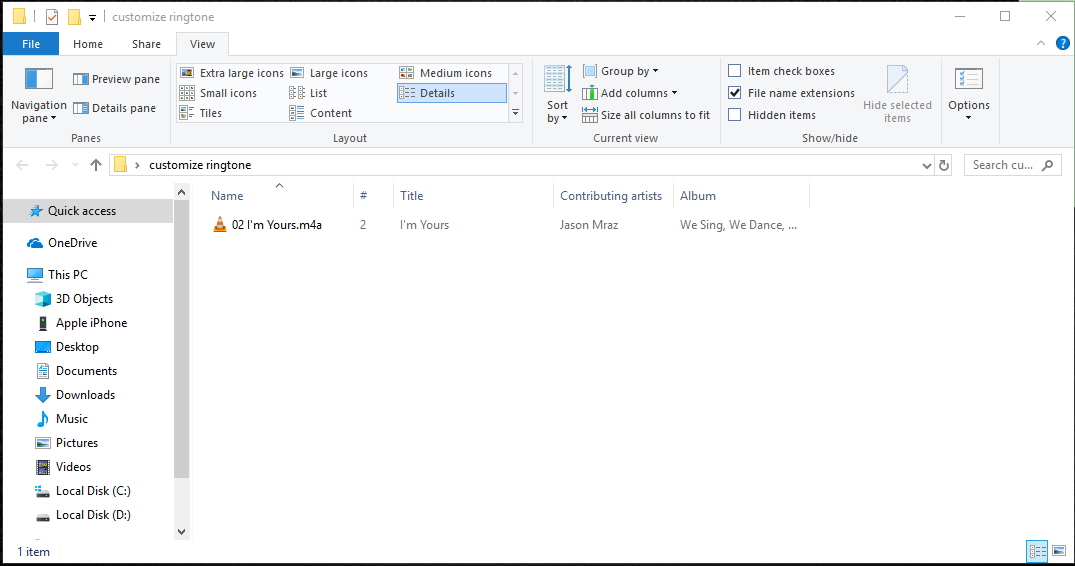
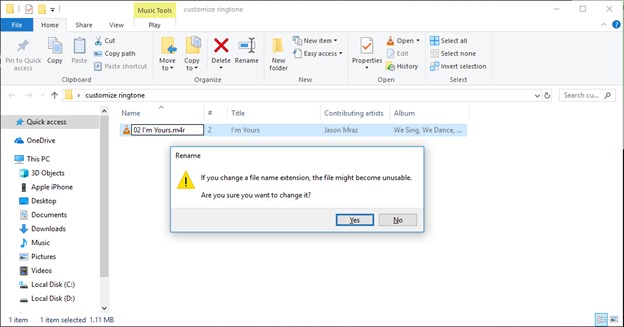
– If you’re using a Windows PC, Select “Show in Windows Explorer” to easily find this song on your computer and right click on the song and select “Rename.”
– Note: In Windows 10, you may not see the file name extension listed. To change the view to show the “m4a” extension, click on the “View” tab and check the box for “File name extensions” to make those viewable.
– Edit and change file extension to .m4r, Click Yes to confirm file name changes and your file will be renamed as I’m Yours.m4r.
And for a Mac:
When you are to make ringtones for an iPhone on a Mac, below are the steps:
– Once you’ve created your custom ringtone, right click on it and select Show in Finder.
– This will automatically take you to a new window, where you’ll see your ringtone highlighted in blue.
– Right click on your song snippet and click on Get Info.
– Change your file extension to .m4r, then select Use .m4r to confirm.
Sync your new ringtone to your iPhone
Go to iTunes and delete the snippet you created by right-clicking on it and choosing Delete.
Plug your iPhone into your computer. Your iPhone will appear in the left-hand iTunes menu under Devices
All you have to do now is drag and drop the .m4r ringtone file you created over from the Desktop or Finder window and drop it to your iPhone in iTunes.
Add the file to tones
If you have a Mac, you can skip this step, but if you have a Windows computer, you’ll need to complete these steps to get your ringtone into the Tones section of iTunes.
Return to iTunes and add the renamed file back into iTunes library. To do this, either drag the file from Windows Explorer into iTunes or go to File and then Add File to Library within iTunes. This will add the .m4r version of your song back into iTunes.
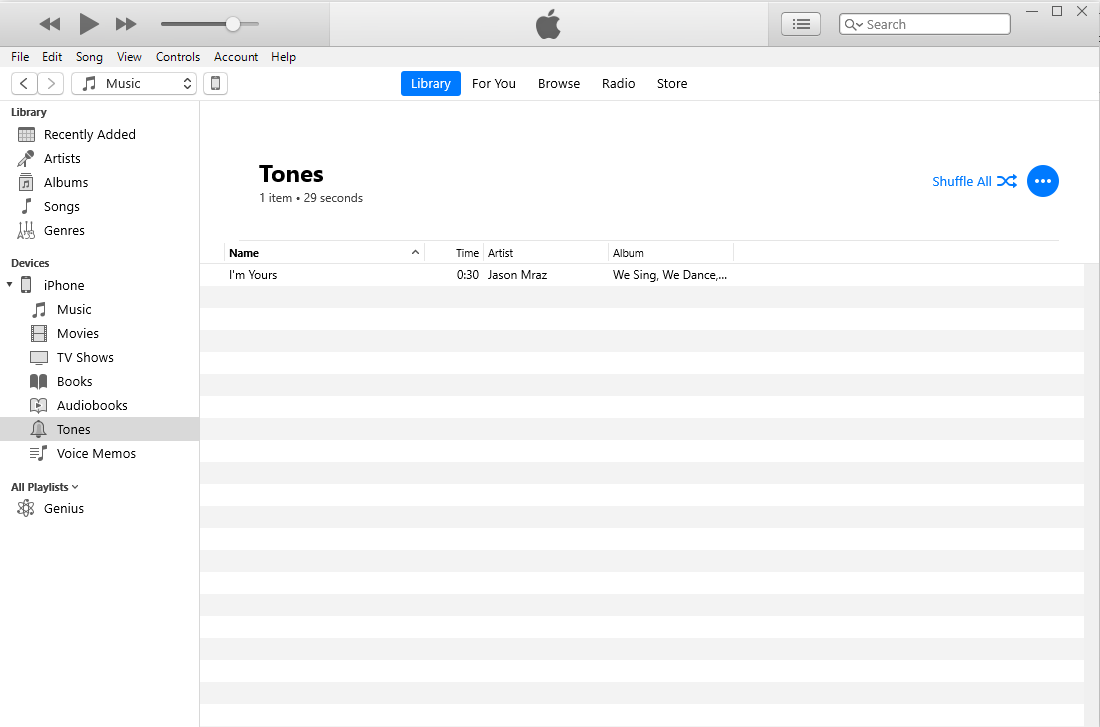
Go back in iTunes, switch from “Music” to “Tones” from the list in the top left corner of your screen below the menu bar. Under Tones, you should see your ringtone file.
Now when you click on Tones, you’ll see your ringtone!
Putting your newly created ringtones on your iPhone with a PC
When you make ringtones for an iPhone, you’ll need to transfer it to your phone, below are the steps:
Plug your iPhone into your computer with your USB cable Plug in your iPhone to your PC with a USB cable.
Drag your ringtone file from iTunes to your iPhone icon.
If you have a Mac, your ringtone will already be on your iPhone. You can see this from the picture above
If you’ve never synced ringtones to your iPhone, you will have to check “Sync Tones,” then either select “All tones” or “Selected tones” from the options. If you did the later, make sure the ringtones you want are checked, then hit “Sync” to finalize.
How to set/start using your ringtone on your iPhone
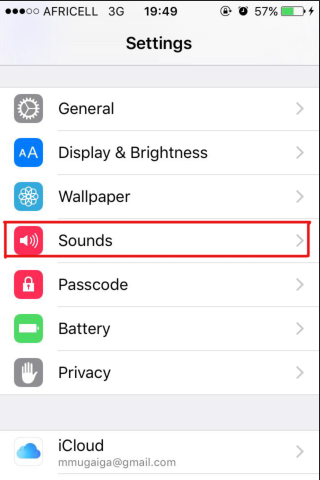
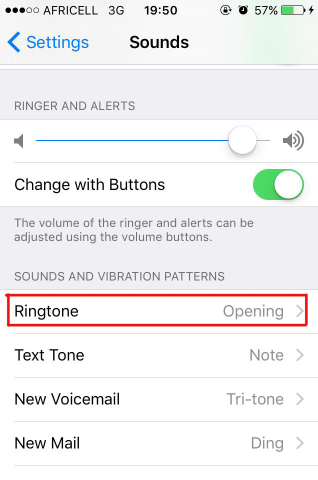
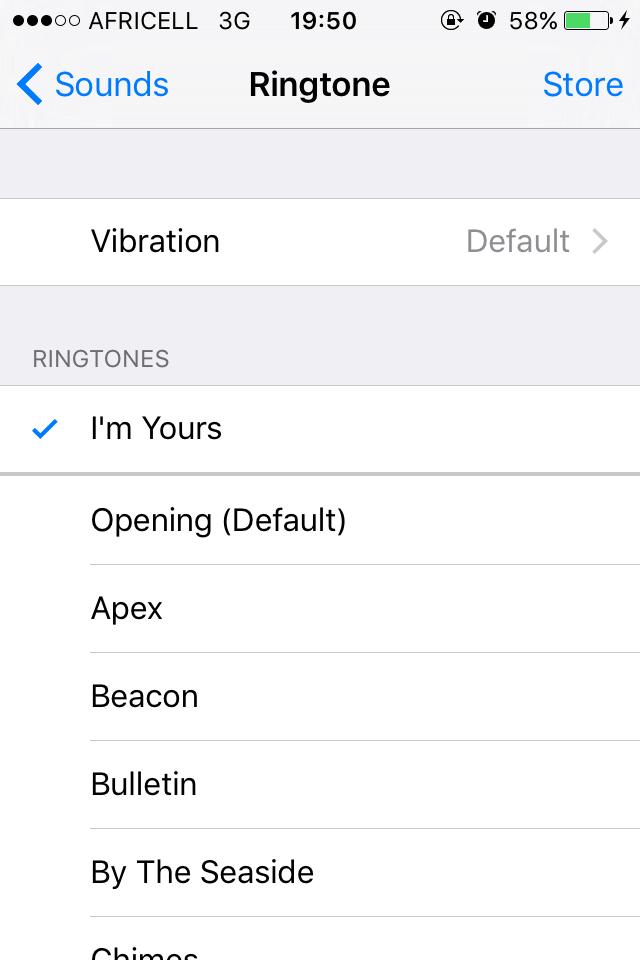
After the above steps, your ringtone should now show up on your iPhone. Go to Settings > Tap Sounds & Haptics > Ringtone.

Under Ringtones, you should see your ringtone file as an option. Select it, and a sample will play for you, You now have your very own customized ringtone!
This will change the default ringtone for any contacts that haven’t already been customized.
The next time your iPhone rings, you’ll hear your custom ringtone. Have a friend call you to try it out!
You can also use your new ringtone as an alert tone for any of the other options listed below Sounds and Vibration Patterns in the “Sounds & Haptics” page. Just keep in mind, if it’s over 30 seconds long, it won’t show up as an option in any of these menu selections.
The next time your iPhone rings, you’ll hear your custom ringtone. Have a friend call you to try it out!
Note: keep in mind that if you want to use your ringtone as an alert tone for texts, emails, calendar events, and more, your ringtone can be no longer than 30 seconds. If it’s over 30 seconds, it won’t show up as an option for alert tones on your iPhone, only for ringtones.
Related:
How to download WhatsApp status updates posted by your contacts
3 ways to back up iPhone contacts to Gmail